
The Attack commences!
 |
| The overall FRENCH plan of attack prior to the game! To draw reserves to the flanks and destroy the CENTER. |
 |
| And so it begins at 14:00 hrs! The French Right flank cdr takes off, while everyone else thought we were going to prep the lines a couple of turns first? (Murphy?) The French guns move up but cannot cross the Portina. |
 |
| The French lines turn 1. The Left moves through disruptive terrain in the orchards! |
 |
| The Right flank Bde (Baron Louis-Vitorin Cassange) moves in to everyone's surprise! Even to the Anlgo-Spanish players! |
 |
| The brigade to the Left (Jacques Puthod) moves up to the Portina in support as planned! |
 |
| I move my Legere troops (2 Bn's) up in open order on line. A NEW patch to the system now tells both the units frontage and distances it can move! I deploy my Line units into line as support hoping they won't take as devastating losses from the Anglo guns? The Bde (Solignac) to my right comes up in columns and preps the Anglo lines with its guns. |
 |
| The CENTER waits! |
 |
| And the Left advances! |
 |
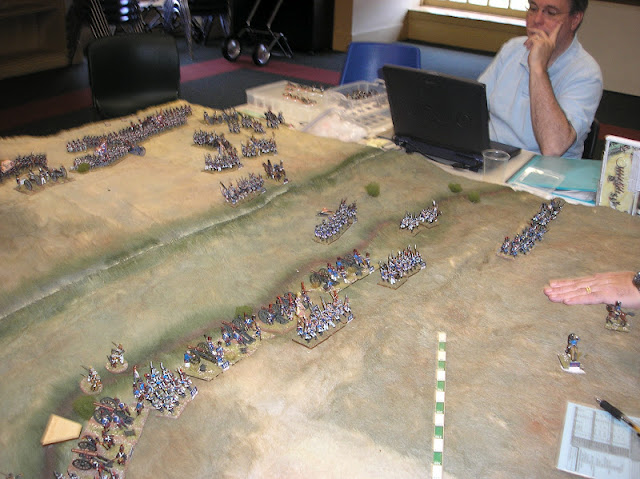
| The situation to my Left of my advance (The Center)! |
 |
| The Spanish deployments and the Redoubt on the Left are formidable! |
 |
| On turn 2 the situation on the Right flank develops as their Bde cdr's blood is up! |
 |
| As does the Left's! |
 |
| I decided to go after and fire on the guns with my Legere to make the guns (6 lbs) a non-issue for my Line units! |
 |
| The overall situation of the 3 Bde's to my Right! |
 |
| The overall situation of the 4 Bde's to my Left! |
 |
| The Nassau units go after the Spanish in the redoubt! |
 |
| And press the Left flank of the Spanish supposedly the weakest troops on the field? |
 |
| View of the situation from the Anglo-Spanish Right flank! The Spanish troops make proper defense positions along the walls which provide heavy cover! |
 |
| And the Center still thinking about the plan! |
 |
| And the view from the Anglo-Spanish Left flank! |
 |
| My troops get bolder as moving makes for less casualties. As we cross the Portina we take fatigue for change of formation. Unit 121 receives a NO ADVANCE w/o an officer (White marker) from enemy canon fire! |
 |
| Our plan starts to work a little as the Anglo-Spanish start moving troops from their Center to the flanks! |
 |
| The Anglo-Spanish Right flank holds fast as the French Cdr ponders what to do next? |
 |
| And after several failed attempts my fresher unit (122) 2/45eme Regt. de Line charges the enemies guns! |
 |
| The Right becomes a swirling mass of Chaos as Bde Cdr's failed to coordinate their attacks properly in support of one another! |
 |
| A closer look at the Right flanks action! |
 |
| As the Left flank develops slower due to the numerous terrain obstacles and stubborn defense! |
 |
| The Spanish hold out amongst the rock walls! |
 |
| The prestigious Host/GM/Game's designer surveys the Carnage & Glory! |
 |
| As the Right flank tries to work its plan and a somewhat coordinated strategy better! |
 |
| My charging unit (122) defeats the guns and runs into the stoic KGL troops who stand like a stone wall! But the enemy is flustered and starts moving troops in my general direction! Ohh - Crap! |
 |
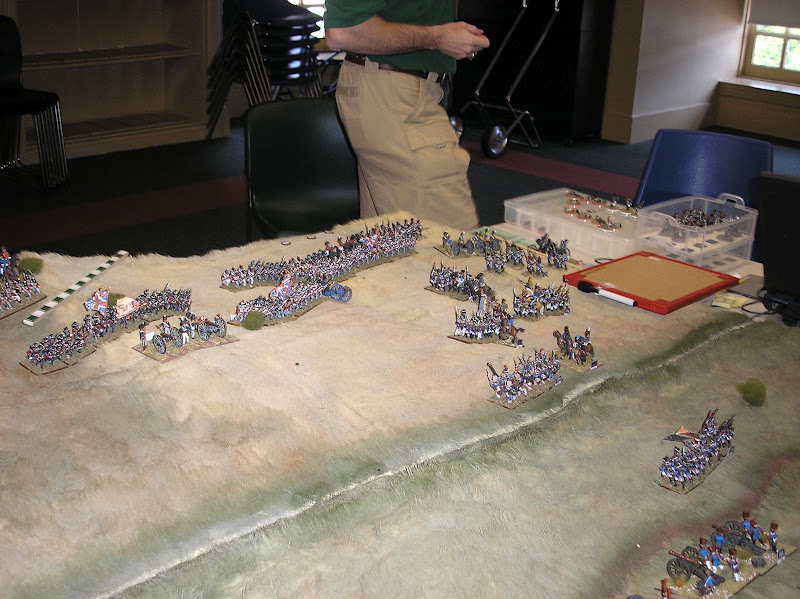
| The situation in the Center develops! Now's the time for the Center to move!!! |
 |
| And it does a little! But I think its destracted as lunch is prepared in the background! |
 |
| The view from the Anglo-Spanish Right flank! |
 |
| And the view from the Anglo-Spanish Left flank! |
 |
| And the Center. My Bde being by the sick on the left! |
 |
| My opposition at this point in the game! According to plan, Ummm - a little bit perhaps? |
 |
| A closer view of the action! As I charge the KGL! |
 |
| The Right develops somewhat to plan, but takes some heavy casualties! Will it succeed??? |
 |
| The Left rethinks its strategy as the Spanish are tougher than originally planned for! Will the French be able to work their master plan??? |
STAY TUNED FOR PART III...
Do you have a tutorial on how you use and paint the teddy bear fur?
ReplyDeletethanks
timmy!
spakot@gmail.com
Tim,
ReplyDeleteI was going to do a posting on it, but the games creator has an excellent tutorial posted here;
http://www.carnageandgloryii.com/battlephotos.htm
Cheers,
Chris