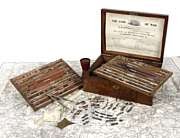
Die Fighting! will be offered for pre-publication sale starting Wednesday, January 26th, and its expected delivery to customers will begin on February 25th, 2011, which is the one-year anniversary of Repique Rules.
http://repiquerules.com/page8/page8.html
The rules cover the period 1700-1900. Die Fighting! features a core set of rules that has been playtested and developed over the last year by groups in two locations in the U.S. and in England. In addition, there are four rule-templates sections, each offering specific rule additions or changes, rating suggestions, and a small bibliography for the Linear Warfare of 1700-1763, the Revolutionary Wars in America and France, the early and later Napoleonic Wars, and finally, the Wars of Transition from 1861-1871 (which includes the ACW, APW, and the FPW). Additional templates for the Colonial Wars of the later 19th century will be posted on the forum.
The game is set to a battalion/regiment/squadron/battery scale, with a ground scale of roughly 25mm to the yard. Twelve to 20 units a side is the sweet spot, though fewer and greater numbers of units are quite alright. Any figure scale is usable. Literally, any figure mounting and stands per unit is possible, so no remounting will be required, regardless of the present organization of your armies. Multiple-player games are easily done, and two of the optional phasing systems are for solo play.
http://repiquerules.com/page9/page9.html
The game uses several new techniques, including the gamers "use up" their die rolls as the game proceeds, an extensive tool-box of turn-phasing options is provided which can be crafted to a period's needs or a gamer's tastes. Wagering and the keeping of game statistics over time is easily done. Some of these ideas have been summarized on the Zouave Blog entries on Die Fighting!
Die Fighting! will be closely coordinated with the new Die Marching! campaign rules design, slated for publication in time for Historicon in the summer of 2011.


The Mechanics of Die Fighting, Part I
Die Fighting began its development journey last May at a French restaurant here in Denver called Le Central. Timm Meyers and I were having a wonderful lunch when he told me of an idea he had about a wargame designed around the idea of expendable dice. His concept was a game on a very large strategic scale set in WWII in where each side would get a bucket of dice for movement and combat, but each die could be used only once, and then are discarded from play. When you use up all of your dice you can’t move or combat the enemy and you have lost the game. I found the idea very interesting, though my interests soon took me in a new direction with the basic concept.
I had finished Zouave,which was a great exercise for me in trying to capture elements of grand tactical decision making. The game was selling very well (and is now sold out!), but Repique needed additional products to sell and an obvious choice was a campaign game. So I began developing a Campaign system that incorporated Timm’s initial concept, but I didn’t get too far before I realized that it would be better to take the idea to the tactical level and work out all of the vagaries in that more controllable and familiar environment, and then use the lessons learned from that process to design the Strategic/campaign rules.
Even better, a “Classic” tactical level game would augment Zouave and, yet, not compete with it, and the campaign rules could then be designed to serve BOTH Die Fighting! and Zouave. I adopted that plan.
So began the design of the Die Fighting tactical rules for the Horse and Musket period from 1700-1900.
Die Fighting has been one of the most rewarding of my design projects. First, the rules are fun! Second, it brought me into contact with a group of wargamers in England, who, under the leadership of Tony Hawkins, have provided invaluable feedback and advice. Two Sheds, Watson, Grizzly, Mr. Ben, Clint, Moon Unit, and other Kett’s Men are a resource that few wargame designers have available.
Of course, the Denver Play test group, Jim Getz, and Pat McGuire have been equally important to Die Fighting’s development.
The key to Die Fighting is the use of typical six-sided dice in three distinct ways; as resource dice that a unit uses to move, fire, melee, and all other battle actions and are used up as the game progresses; as leadership dice that can selectively be used to aid units in their activities, which are also used up, but are restorable during play; and as “Free” dice, which are awarded for situations, positioning, quality, and other transient situational factors. Free dice are limitless, never used up, and are earned by the player’s decisions.
The resource dice are the key to the game, as when they have run out, an army has lost the battle. The comparison of the two army’s final die totals also give a measurable and certain determination of the degree of victory. It provides a unique and exciting game, but also one where statistics, wagers, and “scores” may be kept.
It has taken many months to hone the exact values and balance that makes Die Fighting such a compelling game, and one that demands expansion and add-ons! The final stages of development are drawing to a close and I intend to post several blog entries on the many aspects of the rules and their mechanics. One thing I wish to be clear right from the beginning is that you don’t need to actually have hundreds of dice, as several alternatives are given in the rules. I should also state, however, is many gamers will want to have lots of dice-nothing like hearing the clatter of used enemy dice being thrown in the discard bucket!
Next Time-The qualities of the dice, and many different ways the turn may be phased!
The Mechanics of Die Fighting, Part II
One of my strongest interests in game design has been turn sequencing and phasing, or the order and procedures for taking actions in a wargame. This is primarily because it occurred to me very early on in designing wargames that the key to design isn’t some “Distance=Time X Rate” equation with great emphasis on the rate of march and other nonsense, nor was it, given the paucity of usable data, getting the percentages of hits from fire exactly right. It was how TIME is handled in the game play. Many designers thought that by quantifying the time that activities were thought to take, and then allowing that many actions in a turn would be the answer. George Jeffries was one such designer. Most people that tried this idea as he proposed it found that the paperwork, and the almost impossible synchronization problems made the design unplayable. Others simply locked into a fixed turn sequence that made time so predictable that all parties could plainly predict and foresee what was going to happen next. Time became a caged animal, when we all know from our experiences in life it is a wild beast whose next event is difficult to count upon.
My first attempt at capturing this was the “Denver Bounce” in Le Jeu de Le Guerre in 1972. This simply said you could keep the initiative in a turn as long as you could effect the enemy. When you couldn’t fire upon enemy units or contact them initiative went to the other side. It was a neat idea that several people found fun and different. A variation on this was found in Rebel Yell! in the early 1990s, which also tried to graft role-playing elements on to the tactical wargame. It was a design I never was entirely happy with though certain elements of that design-especially in morale, made its way into Piquet.
The big breakthrough was the design of Piquet that literally cut up the turn sequence and placed it on a series of cards which made up decks that could be quite different for either army. To this was added the wide variation of impetus provided by counter-rolled D20s. It was a great concept that provided for complete unpredictability of next events, no foreknowledge of who would move next or how active he could be, and allowed an excellent way to model an army of any given period or nationality. My later design, Zouave, used a heavily modified variation that actually created two decks within each army-one for command issues and the other for tactical movements and combat. This allowed some great modeling of command, quite apart from modeling regimental tactical skills.
Die Fighting is a completely different animal. Most of its mechanisms are quite different from Piquet, or any other design for that matter. Certainly, using the expenditure of dice as a unified measure of morale, command energy, and combat effects is original as I described in Part I, but the thing which also sets it apart is the turn sequencing.
A turn is made up of six phases (the number six is a recurring theme in the rules) and there are three major ways to sequence the phases. Each phase is a segment of a normal turn ranging from infantry actions to officer movement. The phases may be sequenced in a Fixed Synchronous manner, where the phases on every turn run from 1 to 6 just as many “Old Line” designs, and each army executes the phases in the same order with only an initiative roll determining which side does the phase actions first. Other than a clever exception which reverses the order of the phases on a turn for both armies, or where a phase is completely skipped over, the play is very much in the move - countermove mould of many classic wargames.
But Die Fighting offers other options! Gamers can opt for a Fixed Asynchronous sequencing of phases where each side starts and ends at a different point in the phase order, but they still perform phases concurrently - so one side may be moving infantry, while the other is moving cavalry! Again, there are exceptions that allow for reverse sequencing for either or both, and missed phases.
But there is more! Another set of phasing options is Variable Asynchronous sequencing which employs cards that allow each commander to select which phase he wishes to perform and, depending on his command skill, select the order at will, or have to lay down cards that commit him to 2 or 3 or more phases in a sequence.
Finally, the six cards may be shuffled and cards revealed randomly a la Piquet-though much simpler and cleaner in function. This allows for excellent solo play, or a way to model a particularly inept commander!
Obviously some phasing methods are better tailored to certain periods, or a specific theater of operations, so Fixed Synchronous fits Marlborough’s Wars, but Variable Asynchronous fits the French and Indian or later 19th century wars better. But the real cherry on top of the sundae is that the sequence methods can be DIFFERENT for the two armies! That’s right, Braddock’s forces may be using a Fixed Synchronous method, but his French and Indian enemies out in the woods are using a Variable Synchronous sequence! Even more interesting is the thought of the sequencing CHANGING from one turn to the next for an army depending on the tactical situation! There are many different sequencing options that the gamers can agree to use in playing Die Fighting-no other design is so flexible.
The end result is that the variety of turn phasing in Die Fighting is a tremendous tool for modeling command quality, period tactical flexibility, army quality, and adds tremendously to the drama and suspense of the game play. The Die Fighting gamer has the ability to control and experiment with the flow of time as in no other game.
Next segment- The three types of D6s and The Rule of Six!
The Mechanics of Die Fighting, Part III
06/Dec/10 01:43 PM
Die Fighting, unlike Piquet and Zouave, does not use cards-although that is an option. It does not use various polyhedron dice-but just the simple D6, long known to wargame buffs as THE die. It does not use a Combat Results Table or “Hit” table-just simple counter-rolls. It does this by using three different color dice in play.
The Resource Dice-as described in part one of this series, are the life’s blood of the army. Every action of movement, combat, rallying, or engineering uses these dice-they may only be used once and then are gone. The army without resource dice can do nothing and has lost the game. No equivocating at the pub-you lost!
There are two other die types, “Free” Dice, and Leadership Dice, usually distinguished by color-green for Free dice, and yellow/gold for leadership dice. The Free dice are never used up and are awarded for situational advantages in movement and combat-they may augment the resource dice rolls. Likewise the Leadership dice may also augment the rolls-in movement, combat, and rallies, but they are used up within the turn, but fully restored on the next turn. It is the skillful use of the three dice types in unison that an army succeeds, or, if done wastefully, or poorly coordinated, the army will fail. Nothing comes free in Die Fighting, and hard choices must be made.
Most of these dice are used in simple counter-rolls, additive rolls, or unique effects from doubles or triples being thrown. Simple, quick, and decisive, describes the movement and combat.
There is one theme throughout Die Fighting that recurs in many different forms-called The Rule of Six. If there is some outcome of movement, combat, rallying, or command that one wishes to know-you can bet that the number six is involved! It forms an excellent way to pull all the facets of Die Fighting together, and provides an excellent memory aid for gamers new to the rules. If there is a question-it’s likely six is the answer in some form or interpretation. The factor at issue is going to be rolling a six, moving six inches, subtracting six inches from a move, or retreating six inches before disaster strikes. It is even used when some situation occurs that the rules don’t fully cover (It can happen!) as a means of adjudicating a reasonably fair outcome.
Part IV will talk about the use of period templates to insure that each period within Die Fighting’s 200 years scope is handled in a way that provides an historically accurate and period -rich gaming experience.
The Mechanics of Die Fighting, Part IV
28/Dec/10 02:06 PM
I have previously given my opinion on “Army Lists”-which is, to say the least, critical of such “shortcuts.” Mostly I disagree with the “Codex” approach to historical gaming, and strongly believe that games should inspire and require some historical reading on the part of gamers. The history is, after all, the primary distinction between fantasy games and the historical wargaming hobby. Historical gamers should be proud of this distinction and reinforce it. After all, their roots in wargaming go back to Robert Louis Stevenson, H.G. Wells, and Verdy du Vernois; not to a bunch of entrepreneurs in Nottingham.
If all a game does is provide handy little recipes, where you just add water, it adds very little to the gamer’s knowledge of a period and makes any judgement about the game strictly one of gamesmanship and little or no understanding as to whether it makes any meaningful statements about warfare in the period. At the most absurd end of the scale you get the “Three Flaming Pigs” gaming lists. Many other rules sets succumb to the temptation to require nothing of a gamer but the ability to count to twelve.
I have always chosen otherwise. Surely, a designer needs to provide suggestions and information on the armies and tactics of a period, and provide links, forums support, and suggested sources where a gamer can build a knowledge of a period. A designer needs to explain his premises, and do what he can to make the mechanics of a game clear, and indicate how they dovetail into the historical reality of a period. I see Army Lists as doing none of that, and, indeed, warp the history, and make it less relevant.
Now, if you play fantasy-great-you need lists, as there is no history. But, if you play historical games, I suggest you need something more.
That is why in Zouave, I wrote the ten page addenda for each of the three wars covered by the rules that provided typical historical constructs for the armies, and descriptions of the weaponry. It discussed the issues of command, suggested some historically realistic alternative history, and even suggested some “Unique Events.” that were rooted in the history of the period. Most of all it suggested a bibliography where a gamer could learn more about the period, which would allow him to create new elements to the game and create scenarios that had some connection to the historical record.
In short, it demands a little effort and work-some investment of intellectual capital by the gamer into the play of the game. It provides him with the skills to be a fisherman, and not just hand him some frozen fish!
So it will be with Die Fighting. Each period covered from 1700-1900 will have a “Template” (a term I actually like better than addenda-it will be changed in Zouave II) and this template will group a pair of wars. The template will provide a period specific Free Dice Table, ratings tables along with a Command Divisor number, a number of period specific rules, or rule changes, and a bibliography of easily accessible resources, mostly books, but including other media, that the gamer can use to further ground himself in a period. In essence, a gamer will receive eight different rule sets in one, with more to come on the Forum site.
The included templates are: Linear Warfare, covering the War of Spanish Succession and the Wars of Frederick (1704-1769); The Wars of Revolution (Covering the American Revolution, and The French Revolution (1775-1800); The Napoleonic Wars-divided into Early Napoleonic (1801-1809) and Late Napoleonic (1810-1815); The Wars of Transition-covering the American Civil War, The Austro-Prussian War, and the Franco Prussian War (1861-1871). An Internet posting covering Colonials will soon follow.
None of them will provide an Army List. You should consider buying books-good books-not derivative lists! Dennis at On Military Matters will be happy to oblige!
Here I stand, I can do no other! :-)
© 2010-11 Robert Jones Contact Me