
At 19:00 the situation on the battlefield was as follows: Grouchy's cavalry had captured Tongrenelle and advanced on Mont-Potiaux; in the centre, heavy fighting was taking place around Ligny; on the Prussian right flank there was a lull in the fighting between the Young Guard and the Prussians.
It was now that Blücher received a message that Wellington was heavily engaged fighting Ney's left wing of the French army and, therefore, could on no account send support to Ligny. So Blücher decided to counter-attack on the French left flank, in order to force a decision. First, he strengthened his tired forces in Ligny, and then he collected his last reserves and personally led an attack on Saint-Amand. The attack was initially successful and the Prussians managed to recapture Saint-Amand-le-Hameau, but the attack faltered and they were counter-attacked by chasseurs of the Imperial Guard west of Saint-Amand and started a disorderly retreat from Saint-Amand-le-Haye.
 |
| Saint Amand as seen from the French positions. The village and its surroundings were defended by Steinmetz's 1st Brigade, and 2 btns. of Jagow's 3rd Brigade. On the ridge behind the village (see photo) stood several Prussian batteries. Behind the ridge stood their reserves. These troops came from the I Army Corps. (At Waterloo Ziethen's corps was the one that linked with Wellington's army.) The village and its defenders were pounded by Vandamme's artillery and one or two batteries of the Imperial Guard. The village was attacked numerous times by Vandamme's infantry and the Young Guard. |
 |
| Prussian hussars at Ligny in 1815 (Waterloo Campaign). Picture by Patrice Courcelle, France.De Erlon's army corps spent the day marching between Quatre Bras and Ligny. Meanwhile Marshal Ney was fighting with Wellington at Quatre Bras and Napoleon with Blucher's Prussians at Ligny. Erlon's corps was seen by patrol of Prussian hussars. |
Taking advantage of the Prussians' retreat, Napoleon decided it was time to launch a decisive counterstrike. He could at least beat Blücher and render the Prussians unfit for any serious operation except retreat on 17 June, although he could no longer expect to destroy the Prussian army. Lobau's VI Corps, too, was now arriving and forming up on the heights east of Fleurus. The artillery of the Guard, therefore, came into action above Ligny to prepare Blücher's centre for assault. Some delay was occasioned by a thunderstorm; but, as this passed over, the guns opened and the Old Guard, supported by the reserve cavalry – the Grenadiers à Cheval de la Garde Impériale – led by Guyot, as well as Milhaud's IV Cavalry Corps proceeded to form up opposite Ligny. About 19:45 a crashing salvo of 60 guns gave the signal for a combined assault to be delivered by Gerard and the Guard, with Milhaud moving on their right flank. Blücher's worn-out soldiers could not withstand the tremendous impact of Napoleon's choicest troops, and the Prussian centre was pierced and broken. As a reaction to the Old Guard's attack, Blücher instructed Lieutenant-General Röder to counter-attack with the 2 brigades of the reserve cavalry of the I Prussian Corps.
 |
| A Voltigeur of Young Guard in 1815. Picture by Keith Rocco |
Blücher is incapacitated:
While leading one of the charges in person, the 72-year-old Blücher's horse was shot and fell upon him. He was rescued by Major von Nostitz, and later by one of his aides, and borne in a semi-conscious condition from the field. While Blücher was being taken from the field the French cavalry beat off the Prussian cavalry counter-attack. Lieutenant-General August von Gneisenau (Blücher's Chief of staff), took over command from the absent Blücher.
 |
| Fieldmarshal Blucher on the ground. His excellent horse had been a present from the Prince Regent of England . |
Prussian retreat:
At 20:00 Major-General Kraft announced he would not be able to hold the village of Ligny much longer and half an hour later the Old Guard broke through, signalling that the Prussians had lost the battle. Gneisenau decided to retreat northward on Tilly, which left open lines of communication to the Rhine as well as the possibility of supporting Wellington if Napoleon was to turn on his army.
On the Prussian right, Lieutenant-General Zieten's I Corps retreated slowly with most of its artillery, leaving a rearguard close to Brye to slow the French pursuit. On the left, Lieutenant-General Thielemann's III Corps retreated unharmed, leaving a strong rearguard at Sombreffe. The bulk of the rearguard held their positions until about midnight, before following the rest of the retreating army. In fact, Zieten's I Corps rearguard units only left the battlefield in the early morning of 17 June, as the exhausted French failed to press on. Pirch I's II Corps followed the I Corps off the battlefield and Thielemans III Corps moved last with the armies various parks in tow. The last of III Corps was moved in the morning completely ignored. Von Bulow's IV Corps moved south of Wavre and set up strong rear guard positions for the army to quickly reassemble. Blücher was already in communication with Wellington.
 |
| Prussian landwehr, by Dmitrii Zgonnik. |
Environmental Conditions:
Season: Spring
Weather: Clear
Ground conditions: Good
Terrain:
Ground is typically either flat or gently rolling and consequently there is no direct overhead artillery fire permitted. The urban/built-up areas are located within the Ligny valley with rising ground beyond.
Watercourses – the Ligny stream and its tributaries are non-fordable for their full extent to all troop types other than at marked crossing points. There are several bridges and marked fords. To cross at these points the unit shall perform a formation change, for example, the unit may approach the crossing point in line, then during the movement phase the unit will input line or column as a new formation, deducting 150 paces for foot and 450 paces for cavalry, from the movement allowance. Movement may be pro-rated over two turns as necessary. Defended bridge or fords may only be assaulted by troops in march column formation. These crossing points are typically associated with a building structure, and it is assumed that abattis or other obstructions are present that have the same level of defense as the building structure itself [that is, stone or wooden].
Built-Up Areas – Wooden or stone buildings can only be occupied by infantry and in strength of one battalion per designated building. To be considered as occupying a building, the unit must undertake a formation change adopting the relevant formation. Infantry and cavalry may move through built-up areas or the enclosures/orchards around them, however, close order formations shall input crossing disruptive terrain, and open order formations shall move at half speed. Artillery must be limbered and on a road to move through built-up areas, and speed is reduced by half. Units in march column will move through built-up areas along roads at half speed. An occupied built-up area can be assaulted by one battalion per exposed face, for a maximum of four battalions [one per face]. The assaulting formation can be line, double company or company column, open order can be used if desired.
Fence lines and Hedgerows – Are considered as light or medium, linear obstacles for defensive and offensive purposes. When these fences and hedges form the perimeter of a built-up area, they can be defended by troops in open order only.
Stonewalls – Are considered as heavy, linear obstacles for defensive and offensive purposes. When these stonewalls form the perimeter of a built-up area, they can be defended by troops in open order only.
Line of Sight – is obstructed by built-up areas, woods and hills only. LOS is restricted to 150 within built-up areas.
Troops must be in March Column or limbered to gain road movement advantage.
Prussian Tactical Formations:
Maneuver on road – March Column
Maneuver over open terrain – Company column
Engagement – Line/Company Column
Defense against cavalry – Square/Masse
Maneuver over open terrain – Company column
Engagement – Line/Company Column
Defense against cavalry – Square/Masse
Open order formation is restricted to Light troops only. All infantry have integral skirmisher [third rankers], and may use skirmish fire against any enemy formation – however, as French infantry also have skirmish capability the effect will be reduced.
The Prussian brigade [more reasonably a division] was a compact mixed arms formation that was suited to both offensive and defensive operations. It was formed in three distinct lines of infantry. The first line was composed of two light/fusilier battalions, deployed either in open order, line or company column, and would be the first to engage the enemy.
These battalions would also be the first to occupy built-up areas, supported by their second and third lines, which could occupy additional areas, or act as a counterattacking force to recapture lost positions. The second line was composed of four battalions, deployed in either line or company column, and was intended to engage the enemy in close action either defensively with musketry, or offensively with the bayonet. The third line was composed of three battalions typically in company column, meant to provide a supporting role during a firefight, and an offensive reserve role ready to exploit weaknesses in the enemy position. An attached battery, and one or more squadrons of cavalry directly supported each brigade.
The Prussians were well supported with large numbers of cannon; however, they were rarely amassed into grand batteries that could dominate sections of the field, being more consistently used as close infantry support weapons. Their cavalry suffered from a tendency to be employed in limited strength, and rarely charged jointly above regimental strength.
Prussian Special Scenario Rules:
Reinforcement Schedule:
The following forces are initially off-table and will be available as reinforcements during the course of the game with the following arrival schedule:
Prussian:
Marwitz: Available on turn 1 but will be released at the GM’s discretion only. See also
D’Erlon’s Threat below.
Kraft: Released on turn 8. See also D’Erlon Threat below.
Thumen: Released on turn 8 at the GM’s discretion only. See also D’Erlon Threat below.
 |
| Patrice Courcelle |
The D’Erlon Threat – The Prussian reaction:
On turn 8 you will be advised that the French have been forced to react to an unknown threat, based upon their reaction you will react accordingly:
Prussian Threat Level [TL] response definitions:
French TL I – Assign three cavalry regiments, three infantry regiments and one battery to
flank protection [FP].
French TL II – Assign two cavalry regiments, two infantry regiments and one battery to FP
French TL III – Assign one cavalry regiment, one infantry regiment and one battery to FP.
Upon return of French FP force to the game, the Prussians shall assign an additional cavalry regiment and infantry regiment to FP duties.
All cavalry and infantry must come from either Marwitz [cavalry] or Kraft [infantry]. To determine which units are assigned to FP duties, throw 1d6 per regiment, with lowest score indicating which unit[s] are to be assigned. Assigned units are lost to FP duties for the remainder of the game, as it is assumed they are engaged against D’Erlon’s forces. Associated officers will accompany regiments in FP duties off table.
Prussian Tactical Objectives:
Secure and hold strongpoints within St. Amand [15% per strongpoint]. Retain possession of strongpoints within St.Amand Long Prez/La Haye [15% per strongpoint]. Secure and hold strongpoint at Le Hameau [25%].
Prussian Victory Status:
Victory status will be confirmed by C&GII, inconclusive, pyrrhic, minor or major victory. If the Prussian force achieves more than 50% of their tactical objectives and the French record a major victory, this will be reduced to a minor victory, and if the French record a minor victory, this will be reduced to an inconclusive action.
If the Prussians achieve 100% of their tactical objectives and they record a minor victory, this will be increased to a major victory, and if the result is an inconclusive action, this will be increased to a minor victory.
 |
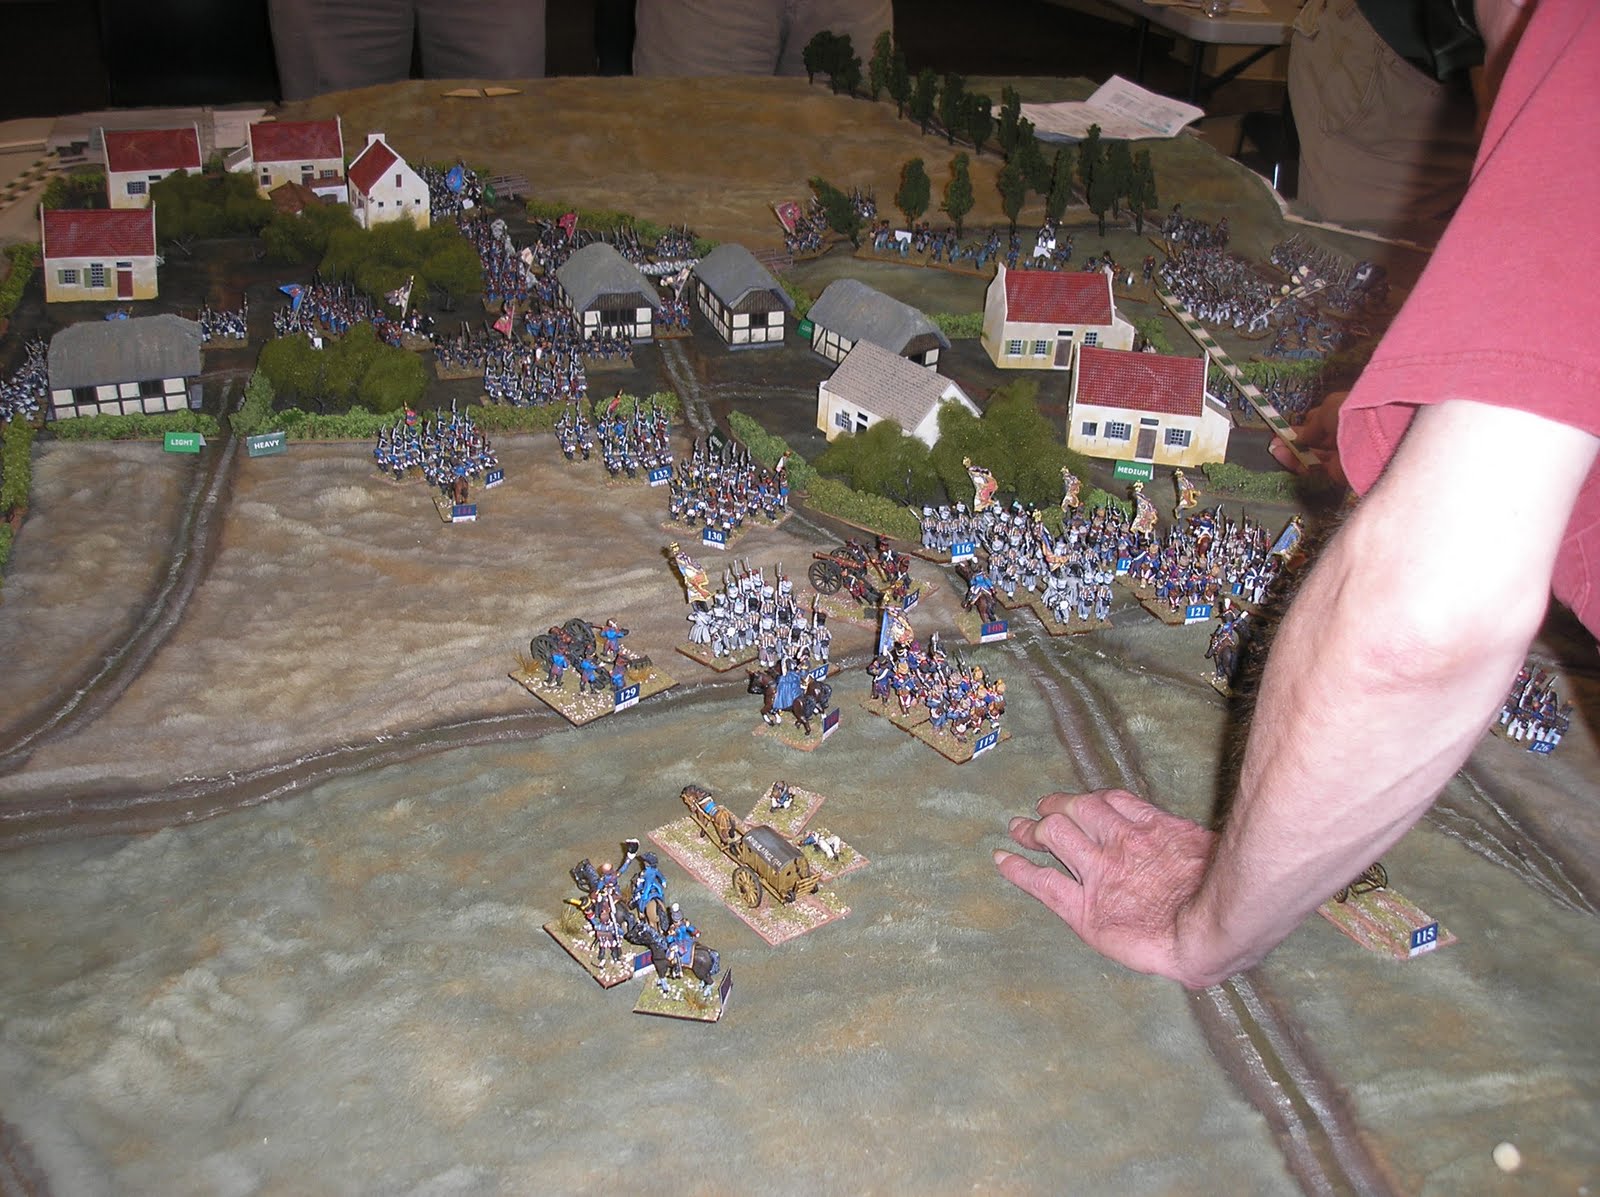
| Battle for Saint Amand, Saint Amand la Haye, and Wagnelee. |
 |
| When last we left my forces had just arrived at Wagnelee! |
 |
| And the bridge and church were the key! |
 |
| Our second Division moves to cover our flank and assist the Center if possible? |
 |
| A broader view towards the Center. |
 |
| The situation in the Center moves rapidly as the Prussian "FU" skirmishers are quickly pushed back. The French are moving fast and it appears can't be stopped! |
 |
| Some Prussian reinforcements try to come up to assist the Prussian Left Flank as well. |
 |
| The Left at St. Amand is becoming bitterly embattled and highly contested by both sides. |
 |
| Battle of Ligny 1815, by Adalbert von Rößler |
 |
| An overall view from our Left Flank looking back towards my troops (Top of pic). |
 |
| The French perspective of the situation in our AO. |
 |
| And their Right Flank. |
 |
| My motivated troops eye the objective & the enemy! |
 |
| While the French are temporarily distracted by our arrival, an attempt to sneak into the church. |
 |
| And our artillery responds to distract and provide cover! |
| Our Left flank attempts to help the Center. |
 |
| The enemy notices our attempts and makes for the bridge. |
 |
| The Center and Left Flank continue to try and stop the French mass. |
 |
| And Gen's Guy and Guy Jr. attempt to take Wagnelee en mass. |
 |
| Our batteries attempt to halt the French onslaught. |
 |
| Even the BUA's are starting to see heavy action. Some fall others hold. |
 |
| A closer view of the action! |
 |
| And from the French perspective. |
 |
| The enemy starts to plan an attack in Wagnelee! "It appears we're losing the battle" |
 |
| But my boy's blood is up and they seize the Church first, and form blocking positions and reinforcements to keep feeding into the church if need be. Remember the French forgot that they have to control the church in order to cross the bridge! |
 |
| A broader view of the situation. |
 |
| And to the Left the French guns disperse ours. "MERDE" |
 |
| The Center continues to fail and fall back as troops are pinned against the Ligny brook with no escape. Definately a negative working against us. Possibly mistake number three? |
 |
| The French fully commit and assault Wagnelee en masse. |
 |
| What little French casualties there are trickle to their rear. |
 |
| The only thing to fear at this point is fear itself. Will this indeed be "Our Finest Hour"? |
TUNE IN FOR THE CONCLUSION NEXT TIME......
Great looking game and I love the teddy-bear fur terrain.
ReplyDeleteWell done!
In case you didn't happen to see this?
ReplyDeleteNigel has posted his technique!
my technique is as follows:
1. Lay out faux fur and comb [or vacuum] through to remove any loose fibers [there will be a lot]. Using the vacuum saves a lot time.
2. Mark out the positions of roads and streams, with a felt tip or marker pen.
3. Using a beard trimmer [I use a Wahl model], trim down the fur pile at the roads and streams. Leave about 1/4" or less file height at the roads, less at the streams.
4. Cut in with the trimmer perpendicular to the direction of the road, to leave the raised section down the center of the road. I actually use this method to cut in my streams, as I like my streams to be narrower than my roads.
5. Using spray paint [I use Model Master Light Earth], spray the roads and streams a brown color [I like my streams to appear muddy, and not the color of the sky].
6. Using spray paints [I use Rustoleum Camouflage paints], spray the fields - I use Khaki for the wheat field, army green for pasture and deep forest green for wooded areas etc].
7. Spray along the center and banks of the road with Model Master Medium or Dark Green.
8. Highlight the fields by very lightly spraying with other shades of khaki, green and browns to give 'texture' to the fields or larger areas.
9. Using a 1/4" flat head brush, dry brush the tracks of the roads, using an acrylic paint [I use Delta Ceramcoat Sandstone].
And you're done........
Doug Kline [BTC] keeps whispering an alternative to the use of the camo paints, but I always forget what he tells me..... [I've probably had too much Scotch at that point to remember much anyway]
Nigel