This uniform appears notably the paintings by Lejeune and David. As with the model set for generals as established on 7 August 1798, it is made of woolen cloth coloured blue the army colour. Only the buttons are reproductions, copied from period pieces. The hat shown here, made by the hat maker Poupard, was not worn at Marengo but is identical to that shown in the paintings and engravings representing the battle.
 |
L'Empereur's habit! Uniform worn by Bonaparte at the Battle of Marengo |
 |
| Uniform at the Musee De L'Armee! |
 |
| Their support moves up as well. |
 |
| And feeling Bold they charge our artillery! This could not be good. |
 |
| Our troops attempt to hold out as long as they can. In earlier play tests they were extremely successful at doing so. |
 |
| So by the second turn into this we're already wondering if our plan will hold out? |
 |
| In the original battle Napoleon's troops were pushed back and he personally attempted to rally them and hold out until Gen. Desaix could arrive! |
 |
| Our gun battery successfully holds out with a wiff of grape shot to the enemy! |
 |
| The enemy is a determined foe and our main line is pushed back vs. falling back on its own. The enemy vigorously pursues. |
 |
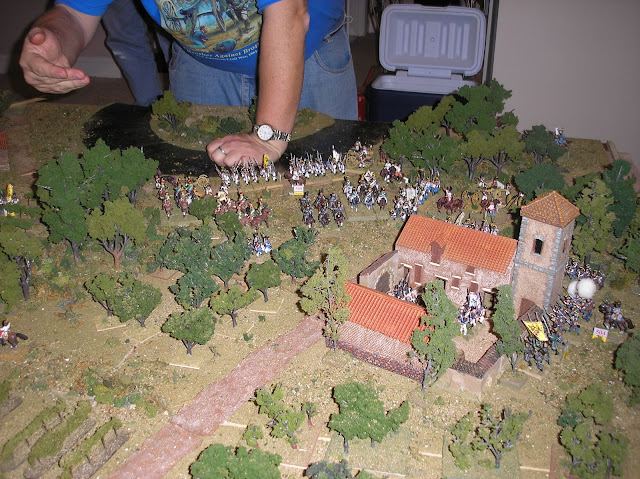
| So by turn three our Main line has collapsed and our Left Flank BUA #2 holds on! |
 |
| Our Right flank (BUA #1) continues to hold out also! |
 |
| It's time to try and Rally our troops as much as we can! |
 |
| Luck can be an unfortunate mistress sometimes and one of our arriving cavalry units leaders defects leaving his unit immobile. See white puff ball. |
 |
| Our other units however move up and are successful at deploying along the opposite (Rear) river bank. This causes the enemy to change facing. |
 |
| The enemy however remains persistent and moves forward all of his assault troops! |
 |
| All forces around the BUA #1 are starting to accrue fatigue and cannot move without a leader present! White Puff balls. The enemy still charges in. Will they be successful? |
 |
| French leaders! |
 |
| Austrian leaders! |
 |
| Austrian tactics during these times still only allowed for assaulting in line! |
 |
| And so they form line and prepare to assault BUA #1! |
 |
| The enemy however is determined and their charge on BUA #1 goes in! |
 |
| The Austrians shift their alignment and so far the battle appears to be going as planned, or is it? |
 |
| They attack BUA#1 in full force! |
 |
| Austrian troops prepare to assault la Piedrabuona. |
 |
| And are successful in capturing it! S#$t our plan has just gone to pieces and the BUA #1 falls quicker than during initial play testing. |
 |
| The enemy presses in on BUA #2 as we attempt to hold out along the opposing river bank! |
 |
| BUA #1 however quickly disintegrates! |
 |
| Will we survive stay tuned for Part Trois! |


Great post, very interesting!!!
ReplyDelete