
 |
| When we last left off the Austrians were continuing to press their attack! |
 |
| Napoleon informing the hard pressed Consular Guard of the arrival of Desaix's division! |
 |
| And with the arrival of fresh cavalry reserves threaten our flank (Left)! |
 |
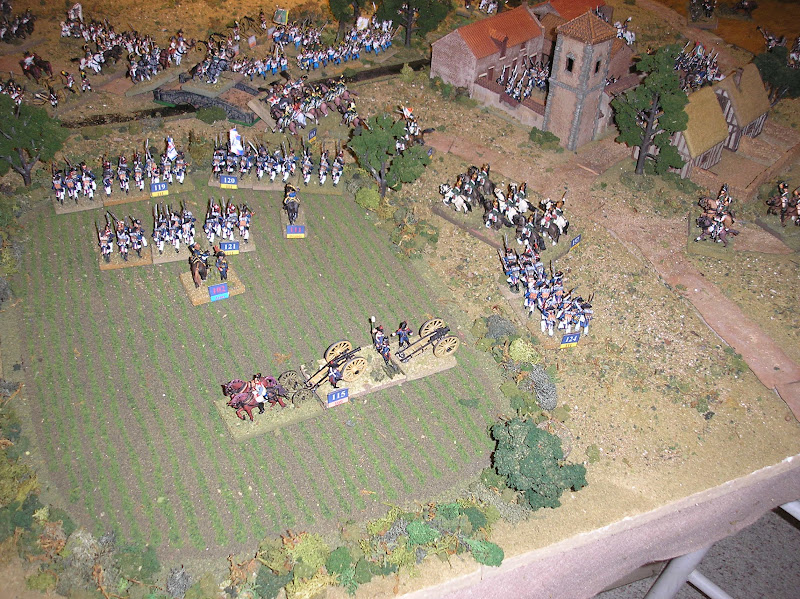
| Their pioneers are also busily attempting to build a foot bridge to cross the stream. |
 |
| They've also managed to set alight BUA #2. Will the French continue to hold out? |
 |
| Some cavalry are moved to reinforce the Left flank! |
 |
| While troops are moved up to support BUA #2 and the possible bridge crossing. |
 |
| Overall view of the Austrians pressing the attack! |
 |
| Our cavalry once again emerges from the cornfield! |
 |
| As we attempt to stabilize the Right flank. |
 |
| Some Austrian troops who attempted an assault on BUA #1 were pushed back (RED Puff). |
 |
| As more move up to try again! |
 |
| Our cavalry tries a rouse in the cornfield again! |
 |
| As the troops in BUA #2 hold out by burning up! Hardcore or stupid? |
 |
| A battle for a key flank erupts (Note Puffs). |
 |
| And the Austrians make their move! |
 |
| And our unit finally vacates BUA #2. Can we hold out is the question? |
 |
| Our cavalry quickly supports the Left flank! |
 |
| And the Austrian attempt fails! |
 |
| A little reorganization on the Left. |
 |
| The Austrians have no choice but to continue their assault along the entire line. |
 |
| While we plan our counter attacks! |
 |
| Overall scene of the Right flank. |
 |
| With our cavalry sneaking up again! |
 |
| As the Austrian Left flank desperately awaits reinforcements! |
 |
| The pioneers inability to build a bridge ties up their best troops who were trying to avoid fatigue! |
 |
| Thus MURPHY for the Austrians helps the French. |
 |
| After beating back the Austrian cavalry charge we prepare for more by supporting our lines! |
 |
| The Austrians slowly prepare for their all out assault. |
 |
| And the threat to the flank stabilizes. |
 |
| Overall view of Austrian forces awaiting a bridge! |
 |
| The defeated Austrian cavalry attempts to recover while more move up. Attacking in road march column over a bridge is never good! (Note: RED Puff) |
 |
| The Austrian Left starts to prepare to move! |
 |
| And so does our cavalry! |
 |
| View from the cornfields! |
 |
| View of the flank stabilized! |
 |
| As the Main Objective prepares for reinforcements in case it is lost! |
 |
| Austrian artillery starts to come into play! |
 |
| While the disorganized center continues to wait. |
 |
| Will the Austrians, or French prevail! It's still all up in the air at this point. |
 |
| As the Austrians try again! |
 |
| Assaulting the Main Objective as well! |
 |
| The bridgehead continues to fail. Good to see Murphy not only likes me. lol. |
 |
| And so the center stalls out (The best troops wait). |
 |
| And our cavalry comes out again! |
 |
| As we prepare on our Left! |
 |
| Here they come in the same old style! As some grenadiers cross over on the Right! |
 |
| They decide to threaten the Center (flank) once again. |
 |
| And go for BUA #2's weakened troops as well. |
 |
| We wait to spring our cavalry at the right moment! |
 |
| With the failure of both the cavalry and assault on the Main Objective more troops cross over! |
 |
| Will the French Right hold? |
 |
| Overall view of the action! |
 |
| Tune in for the conclusion NEXT! |
TO BE CONTINUED........
No comments:
Post a Comment